
Relic guitars have taken the music world by storm, with their beautifully aged finishes and vintage vibes. But did you know that you can transform your own guitar into an authentic-looking relic masterpiece, without breaking the bank? In this blog post, we’ll guide you through the entire process of how to relic a guitar, sharing expert tips and tricks to help you achieve that perfect, worn-in look for your guitar.
From understanding the role of nitrocellulose finish to personalizing the neck and handling the relic guitar controversy, we’ve got you covered. So grab your tools, and let’s dive into the fascinating world of relicing guitars!
Short Summary
- Choose a nitro-finished guitar for relicing, and research reference materials to plan the aged look you want.
- Gather essential tools like sandpaper, luthier tools & blunt objects to create realistic wear & damage on your guitar.
- Age hardware and pickups with filing/steel wool or chemical solutions. Take safety precautions when necessary!
Choosing the Right Guitar for Relicing

Before you start your relicing journey, it’s crucial to choose the right guitar for the job. One key factor to consider is the guitar’s finish. A nitro finish, or nitrocellulose lacquer, is highly recommended for relicing, as it is more prone to wear and tear compared to polyurethane finishes. Vintage guitars with a nitro finish will give you the most authentic relic look.
If you’re new to relicing, you might want to practice on an inexpensive second-hand guitar before working on a more valuable instrument. Check out junk shops, antique shops, charity shops, or even online for some great deals on second-hand guitars to practice relicing.
The Importance of Nitrocellulose Finish

So why is nitrocellulose finish so essential for relicing guitars? Unlike polyurethane or polyester finishes, nitro finishes tend to wear down more easily, making them ideal for creating a relaxed guitar look. Furthermore, nitro finishes don’t last as long and aren’t as glossy as polyurethane finishes, adding to their vintage appeal.
To determine whether your guitar has a nitrocellulose finish, try sanding a small, inconspicuous area of the guitar’s body. If the finish wears down, you’re good to go. Remember, the type of finish plays a significant role in the relicing process, so it’s essential to choose a guitar with a nitrocellulose finish.
Preparing Your Guitar for Relicing
Before you start relicing your guitar, proper preparation is key. Begin by disassembling your guitar and organizing its parts.
Research reference materials, such as photos of vintage guitars and tutorials on relicing techniques, to help you decide which parts to work on. It’s essential to plan and visualize the aged look you want to achieve for your guitar.
Disassembly and Organization
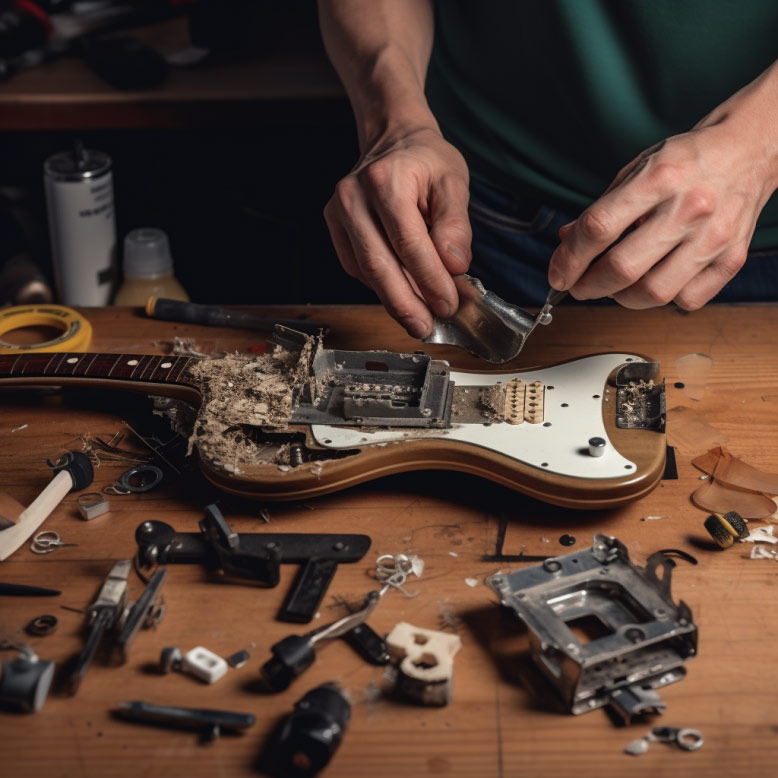
Start by removing all the metal parts from your guitar, including the bridge, tuners, knobs, and, if possible, the neck. Organizing and separating the different metal parts will make the relicing process more manageable and help you achieve a completely unique look.
If you’re not comfortable handling the guitar’s electronics, you can either leave them in place or cover them with masking tape to protect them during the relicing process. This way, you can focus on aging the guitar’s body and hardware without worrying about damaging the electronics.
Gathering Reference Materials
To ensure a realistic and authentic relic look, gather reference materials like photos of vintage guitars, articles or books on guitar history and construction, and tutorials on relicing techniques. These resources will serve as a valuable guide and inspiration for your relicing process.
Once you’ve gathered your reference materials, study them carefully to understand the natural wear patterns and particular features of vintage guitars. This knowledge will help you create a more believable and accurate relic job on your own guitar.
Essential Tools for Relicing Guitars
Before you start relicing your guitar, make sure you have all the necessary tools and materials. To give an authentic relic look, different types of sandpaper with varying grits are essential. Additionally, luthier tools, nitrocellulose lacquer, and blunt objects for dents can help complete the job.
Having the right tools is crucial not only for achieving the desired aged look, but also for ensuring the relicing process goes smoothly and safely. Be sure to gather all your tools and materials before starting, so you can focus on creating the perfect relic look for your guitar.
Creating Realistic Wear and Damage
Now that you’ve prepared your guitar and gathered your tools, it’s time to create realistic wear and damage. Start by marking the spots you want to sand on the guitar’s body. When sanding, use different grit levels of sandpaper to ensure a smooth transition from the exposed wood to the untouched finish for a more realistic appearance.
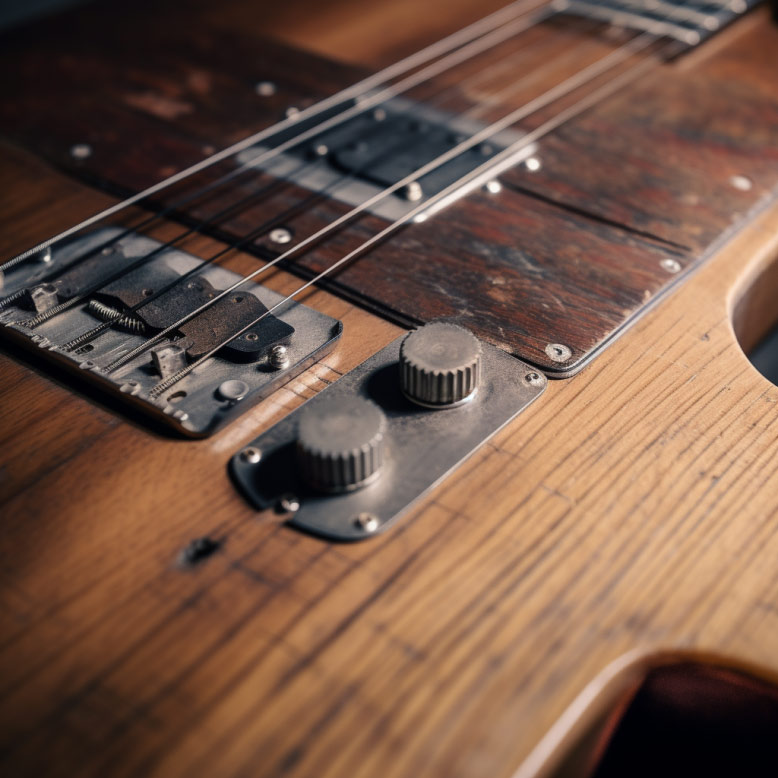
Next, create chips, dings, and dents that an old guitar might have accumulated over time. You can use blunt objects like an input jack or a belt buckle to create authentic-looking damage. Remember, the goal is to replicate the natural wear of a vintage guitar, so take your time and pay close attention to detail.
Sanding Techniques
To achieve a worn-in look on the guitar body, use sandpaper, a Scotch-Brite pad, or an abrasive to wear down the finish. Be careful not to overdo it, as too much sanding can result in an unnatural appearance. Experiment with different grit levels to find the perfect balance between exposed wood and an untouched finish.
Heating and cooling guitar bodies, like the one you’re working on, can also help create a realistic checked look on the finish. Try freezing the guitar body overnight and then letting it thaw, or use a heat gun and compressed air to achieve this effect. Remember, practice makes perfect, so don’t be afraid to experiment with different techniques until you achieve the desired wear and damage on your guitar.
Chipping and Scratching Tips
To create a convincing relic look, your guitar should show signs of wear and tear that has happened naturally over the years. Use various blunt objects, such as a screwdriver, hammer, or even a spoon, to create scratches and dents in the finish.
Be mindful of where players usually rub away at the finish of the guitar, like the back of the guitar where the armrests are, and focus on those areas. The bottom edges of a guitar also tend to take the brunt of damage from drops or pokes, making them ideal spots for chipping and scratching.
By paying attention to these details, you’ll create a relic electric guitar that looks like it’s been played hard and loved for years, just like some cherished acoustic guitars, and not like a brand new guitar from the Fender Custom Shop or Gibson Custom Shop Guitars. In fact, many musicians appreciate the unique character of road-worn guitars.
Aging Hardware and Pickups
To create a cohesive relic look, don’t forget to age the hardware and pickups to match the guitar body. You can either use pre-aged hardware or try some DIY techniques like filing, exposing them to elements, or using solutions of bleach and water or vinegar.
Remember, the goal is to achieve a natural, aged look that complements the natural guitar body. Take your time and experiment with different techniques to find the perfect balance between aged hardware and the overall relic look of your guitar.
Filing and Steel Wool
Filing and steel wool are effective techniques for distressing metal hardware on your guitar. Use a metal filing tool or steel wool to rub off the shiny gloss finish, giving your hardware an aged appearance. Be gentle and work in small areas to ensure an even, realistic wear.
Once you’re satisfied with the aged look of your hardware, clean it with a cloth to remove any debris or residue. This will ensure your compatible hardware not only looks great, but functions properly as well.
Chemical Aging Solutions
Chemical aging solutions, such as acids and oxidants, can help create a rusty or green appearance on your guitar hardware, enhancing the relic look. Inorganic acids like ferric chloride or muriatic acid are particularly effective for achieving a realistic and reliable relic job.
When working with chemical aging solutions, it’s essential to take safety precautions, such as wearing protective eyewear and gloves, to avoid accidents or injuries. As with any relicing technique, practice on spare hardware before applying it to your guitar to ensure the desired effect.
Personalizing Your Relic Guitar Neck
After relicing your guitar body and hardware, it’s time to personalize the neck. Before working on the neck, practice on a cheaper guitar neck to ensure you’re happy with the result and can do it reliably. Sanding down the back of the neck and polishing the fretboard will give your relic guitar a worn-in look and a smoother feel.
Add some personal touches to your relic guitar neck by wearing away the finish where your pinky rests, sanding off the fretboard binding, or cutting into the last couple of frets to make it look like you’ve done damage with your heavy strumming. These small details will make your relic guitar truly unique and reflective of your playing style.
Relic Guitar Controversy
Despite the growing popularity of relic guitars, there’s a certain level of controversy surrounding the trend. Some guitarists see relicing as a way to pretend to be something you’re not, and they argue that it’s fake and makes the player look like a poser. Others, however, appreciate the vintage aesthetic and appreciate the craftsmanship involved in a well-done relic job.
Ultimately, whether you love or hate relic guitars, there’s no denying their impact on the guitar world. As with any artistic endeavor, relicing is a matter of personal taste, and what’s most important is finding a guitar that inspires you and feels great in your hands.
Safety Precautions and Professional Help
Relicing a guitar can be a fun and rewarding process, but it’s essential to take safety precautions and seek professional help if needed. Working with chemicals, sharp tools, and valuable instruments can be dangerous, so always prioritize safety and follow the proper guidelines.
If you’re not comfortable with relicing your guitar yourself, consider hiring a professional guitar tech or luthier who specializes in aging guitars. They can help you achieve the perfect relic look for your guitar while ensuring the process is done safely and effectively.
Summary
In conclusion, replicating a guitar can be an exciting and fulfilling project for any guitar enthusiast. By choosing the right guitar with a nitrocellulose finish, gathering the necessary tools and materials, and carefully following the steps outlined in this guide, you can create a stunning relic guitar that looks and feels like a vintage treasure.
Whether you’re a seasoned guitarist or just starting on your musical journey, replicating your guitar can be a unique way to express your personal style and passion for the instrument. So pick up your tools, roll up your sleeves, and embark on the thrilling adventure of replicating your very own guitar!
Frequently Asked Questions
Is it easy to Relic a guitar?
Relicing a guitar isn’t difficult — all you need to do is expose the guitar to sunlight for a few days and then you’ll start to see that vintage patina everyone loves. With just a small effort, you can have a unique guitar that has that sought-after relic look.
How do I make my guitar look distressed?
If you want to give your guitar a distressed look, the easiest way is to use sandpaper and steel wool. Scrubbing with an abrasive removes the thin coat of polyurethane lacquer or nitrocellulose which can then be used to chip the paint and distress it.
Steel wool will also help to age the metals.
What does Reliced mean on a guitar?
Relic guitars have a unique “lived-in” look that makes them stand out from the rest. By using specific techniques such as ageing, distressing, scratching, chipping, and tattering, the guitar can achieve a certain vintage-like style to give it an authentic feel.
If you’re looking for a unique guitar that has seen some wear and tear, then a relic is the perfect option for you.